.png?width=200&height=89&name=CC%20logo%20blue-1%20(1).png)
Read this article to understand how to:
- Create an Account
- Edit Account details
- Add/remove Account Managers
- View Users
1. To create a new account, head to Admin > Accounts. 
Click on the Add New Account button.

2. Complete the fields to create your account. Details as below:
- Account Name - Or username for users. It's a unique identifier which can be used for synchronising account data with your other databases. For example, this may be the primary key, ID or a GUID that you use in the company or account table in your CRM system.
- Company name - Name of the account or company.
- Country - Primary location of users within this account.
- Main Language - Main language for users within the account.
- Account Manager - Contact details for this account’s sales manager. If these fields are blank, then the publisher’s general contact information will be shown to users.
- Account Registration Options—This option allows you to choose how and if users can register. This feature is important because it determines whether your site is open or not. More information regarding account registration options can be found here.
3. Click Continue.

Add/Edit Account’s Additional Information
After creating an account you can then edit the company details, the account contact, and users’ information. Simply click the pen icon to the right-hand side of the page.
The Account Manager
This section allows you to add or remove the Account Manager if required. To do this, click on the pen icon. If you need to create an Account Manager, find out how to here.
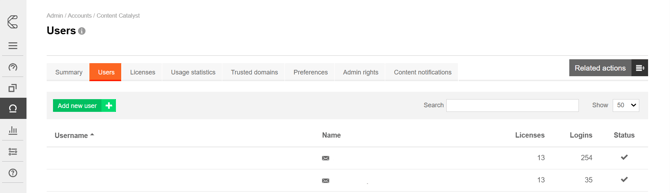
Users
The user's section allows you to view the number of users attached to the account. You can view the following:
-
Lead user - you can find the lead user’s contact information and the other contact details shown on the report marketing pages.
-
Active - active users are able to login to the site. These statuses are set to enabled, denoted by a green tick in the status column of the user list.
- Disabled - disabled users are unable to login to the site. The user's status is set to disable, denoted by a blank circle (no green tick) in the status column of the user list.
Next Steps
Now that you have created an account, what next? Here are the related articles to help you:
Setting up Licenses
Add a Category-wide Level License